如何让 MCP 服务器兼容 MCP-UI

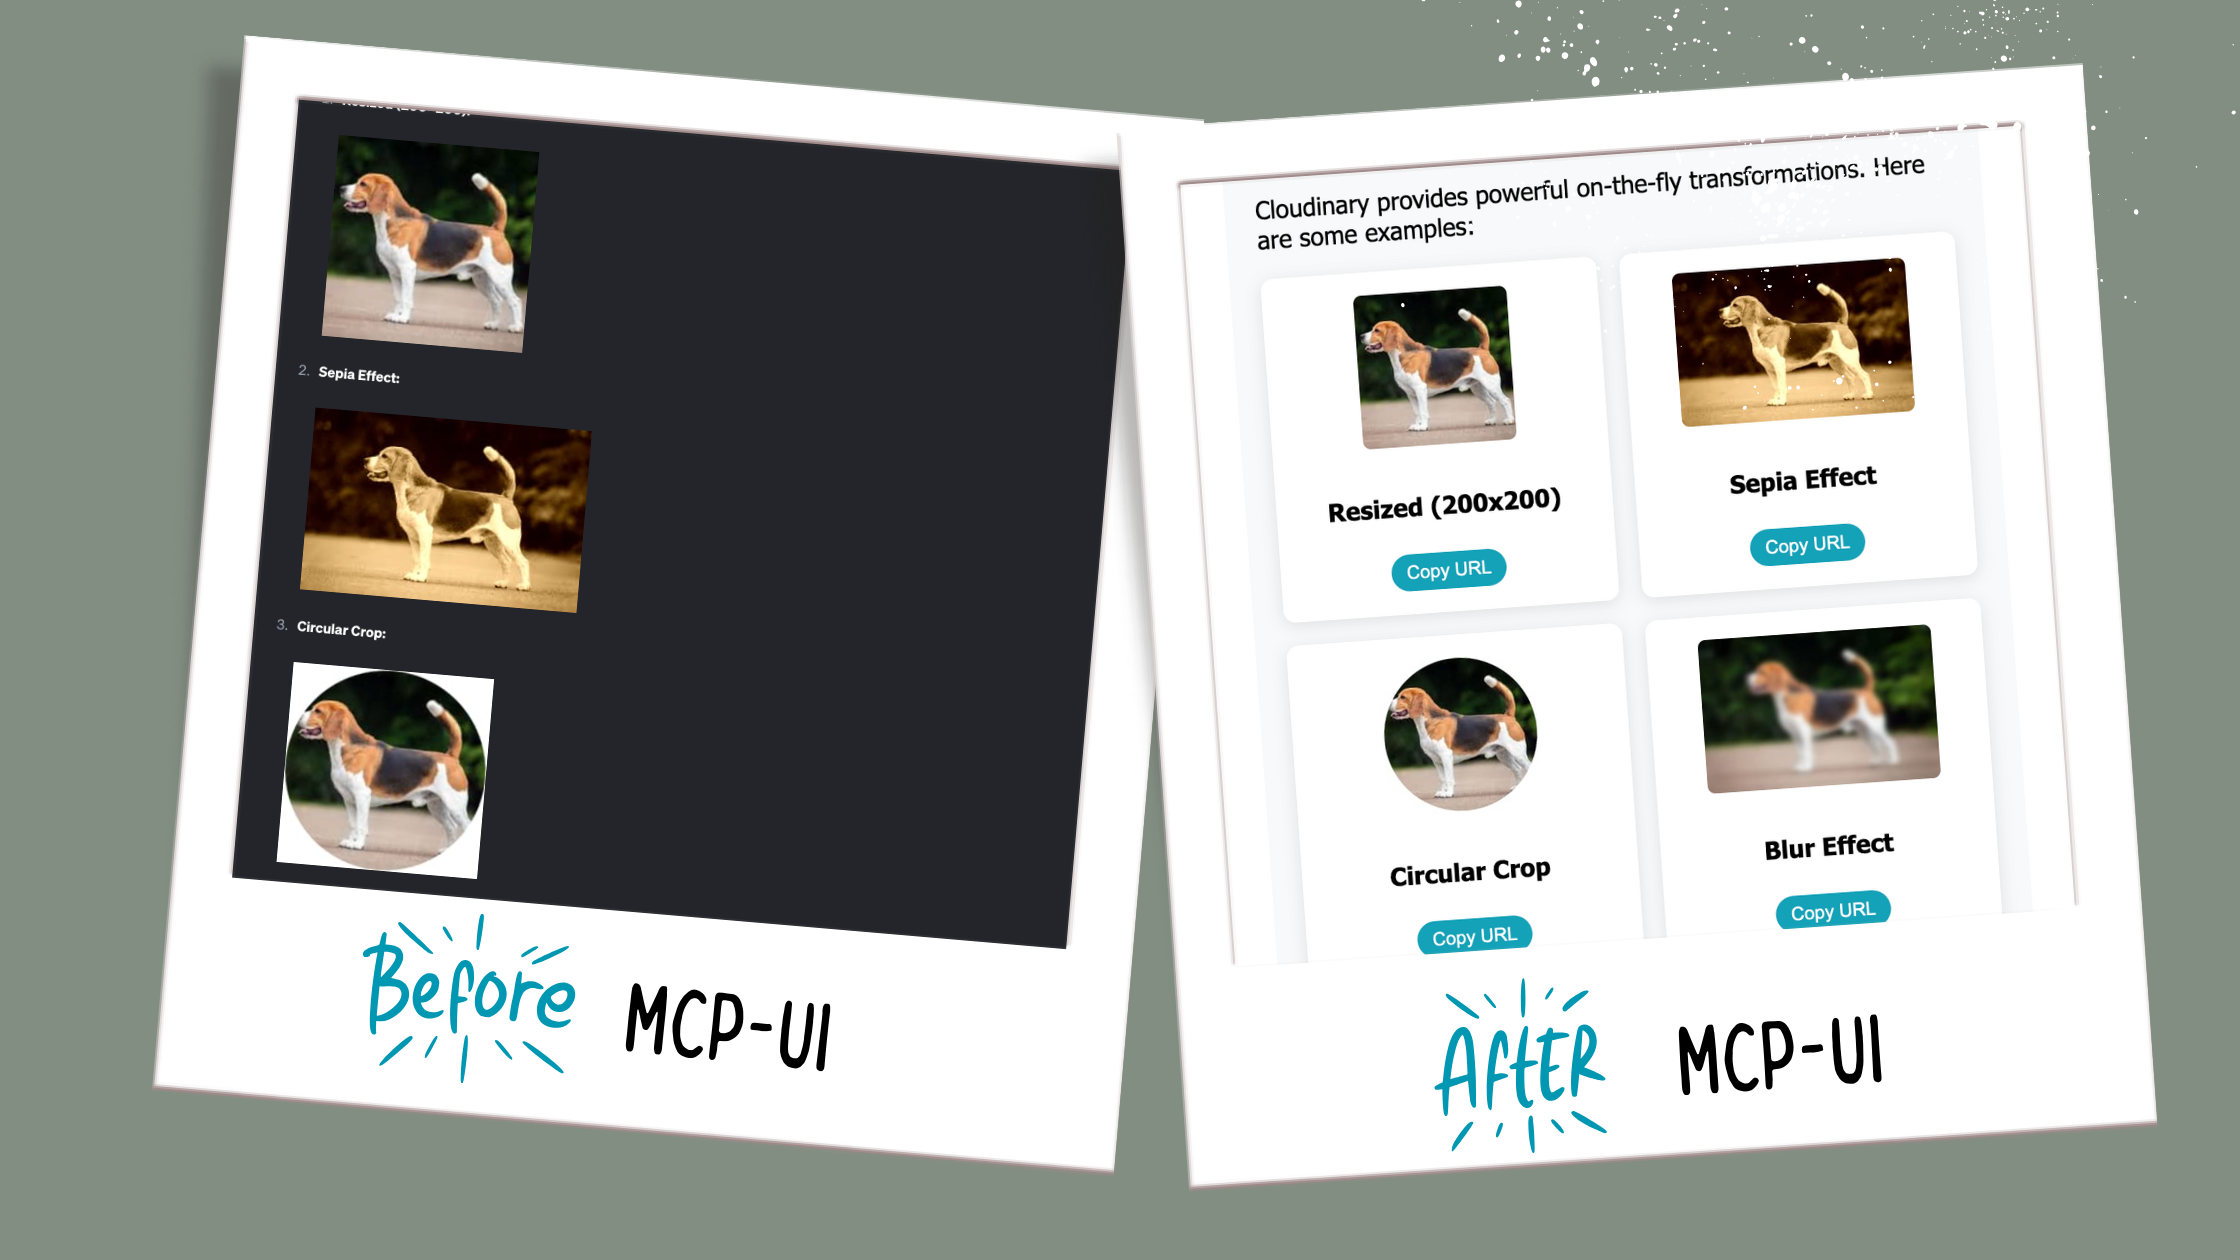
MCP-UI 还在襁褓期,这么早入场有种让人上瘾的感觉。我们正处在规范和客户端实现都在积极发展的迷人节点,我发现跟着这种演进一起构建令人兴奋。
我想看看自己能把它推多远。于是我拿了两台开源 MCP 服务器,Cloudinary 和 Filesystem,给它们加了 UI。不再是无聊的文本,我现在直接在 goose 里得到丰富、可交互的界面。
我为什么想要这个
原始 JSON 和文本也行,能把事办完,但说实话我更想跟漂亮的东西交互。给我一个酷的 UI,而不是来回提示。
以 Cloudinary 为例。默认情况下,上传返回一块文本,基本上是 URL、元数据和 public ID 的 JSON 转储。有用,当然,但不那么容易一眼看清。
我真正想要的是:
- 图片和视频预览
- 一键复制或查看链接的按钮
- 变换示例
有了 MCP-UI,回应不再只是文本。现在回应可以是小小的应用,你可以在智能体的聊天界面里实际点来点去。
模式
酷的地方在于,对任何 MCP 服务器,步骤基本上都一样。
1. 安装 SDK
npm install @mcp-ui/server
2. 导入它
import { createUIResource } from "@mcp-ui/server";
3. 构建你的 HTML
对我的 Cloudinary 服务器更新,我用了 Direct HTML → iframe。我写了一个函数,返回包含上传预览和操作按钮的 HTML 字符串。
MCP-UI 用 srcdoc 把那段 HTML 渲染进 iframe。
它简单、完全自包含、迭代快,而且我能完全控制它的样子。
💡 不过,还存在其他模式:
-
外部 URL——用 iframe 嵌入一个托管页面:
content: { type: "externalUrl", iframeUrl } -
远程 DOM——发送一段脚本,直接在宿主的 DOM 里构建 UI:
content: { type: "remoteDom", script, framework }
但对我的用例,直接 HTML 正合适。
4. 两者都返回
在你的工具处理函数里,我建议同时返回原始回应和 createUIResource。
就这样。无论哪台服务器,主要步骤都一样。
目前 MCP-UI SDK 只有 TypeScript 和 Ruby。 如果你的服务器用的是这两种语言之一,今天就可以开始。 如果不是,你要么等更多 SDK 发布,要么自己写绑定。
步骤 3:我的 Cloudinary UI
这是我为 Cloudinary 写的 HTML 生成器,你在这里决定 UI 到底该长什么样。
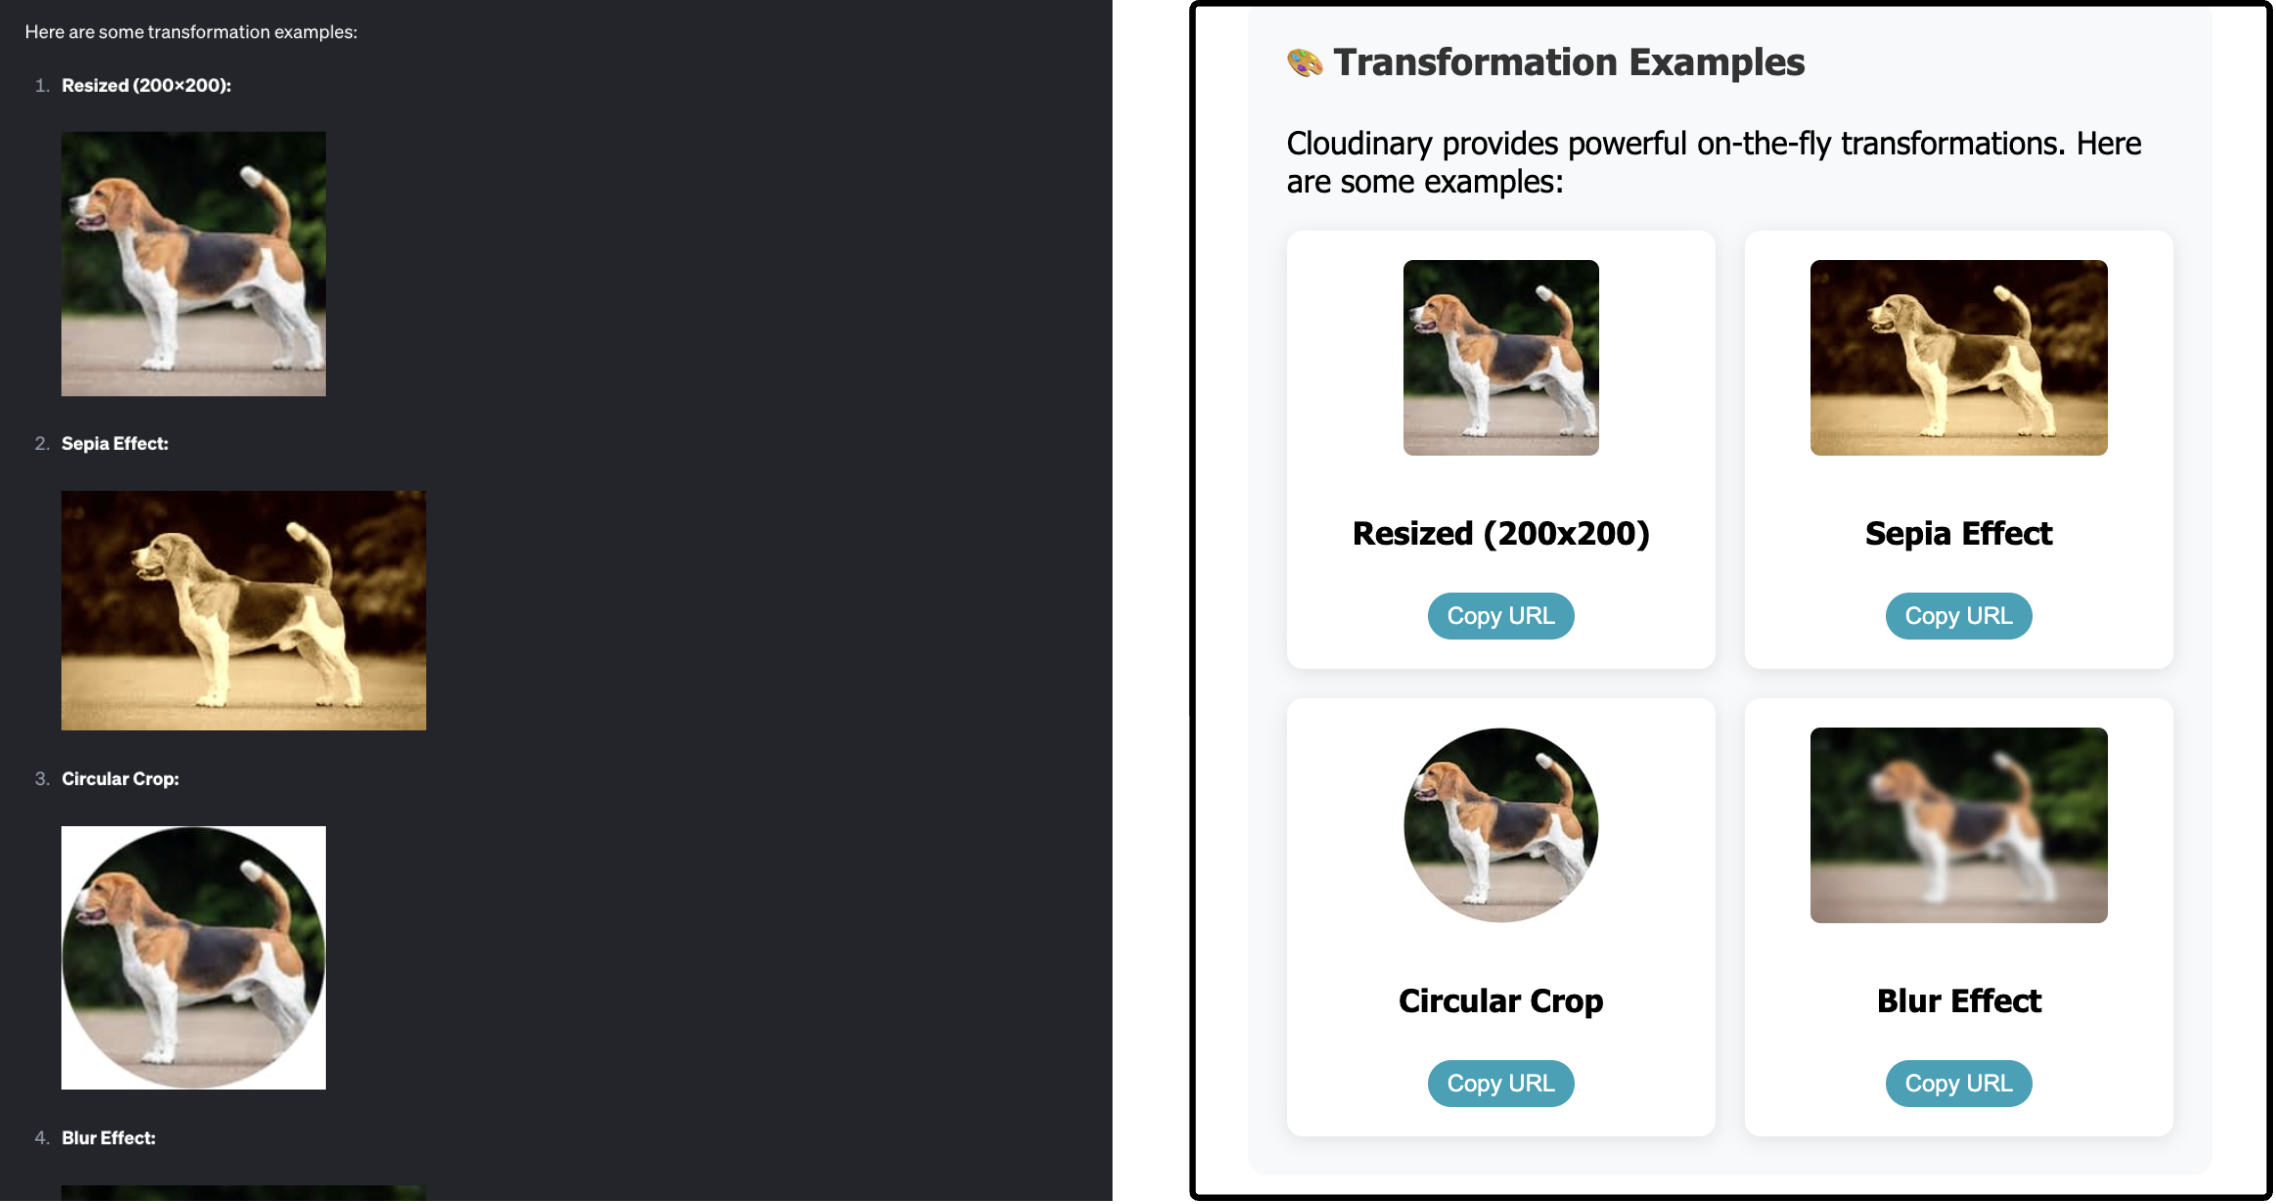
与其只是告诉你,我们来看看差别。
MCP-UI 之前(左): 一块没有样式的文本,带着链接和原始变换
MCP-UI 之后(右): 干净的布局,带可爱的交互卡片和预览
点击查看代码
private createUploadResultUI(result: UploadApiResponse): string {
    const isImage = result.resource_type === 'image';
    const isVideo = result.resource_type === 'video';

    return `
    <!DOCTYPE html>
    <html lang="en">
    <head>
    <meta charset="UTF-8">
    <meta name="viewport" content="width=device-width, initial-scale=1.0">
    <title>Cloudinary Upload Result</title>
    <style>
    body {
      font-family: 'Segoe UI', Tahoma, Geneva, Verdana, sans-serif;
      margin: 0;
      padding: 20px;
      background: linear-gradient(135deg, #667eea 0%, #764ba2 100%);
      min-height: 100vh;
    }
    .container {
      max-width: 800px;
      margin: 0 auto;
      background: white;
      border-radius: 15px;
      box-shadow: 0 20px 40px rgba(0,0,0,0.1);
      overflow: hidden;
    }
    .header {
      background: linear-gradient(135deg, #4CAF50, #45a049);
      color: white;
      padding: 30px;
      text-align: center;
    }
    .content { padding: 30px; }
    .preview-section { text-align: center; margin-bottom: 30px; }
    .preview-section img, .preview-section video {
      max-width: 100%; max-height: 300px; border-radius: 10px;
      box-shadow: 0 10px 30px rgba(0,0,0,0.2);
    }
    .actions { display: flex; gap: 15px; justify-content: center; flex-wrap: wrap; }
    .btn { padding: 12px 24px; border-radius: 25px; color: white; border: none; cursor: pointer; }
    .btn-primary { background: #007bff; }
    .btn-success { background: #28a745; }
    </style>
    </head>
    <body>
      <div class="container">
        <div class="header">
          <div style="font-size:3em">✅</div>
          <h1>Upload Successful!</h1>
        </div>
        <div class="content">
          ${isImage ? `<img src="${result.secure_url}" />` : ''}
          ${isVideo ? `<video controls><source src="${result.secure_url}" /></video>` : ''}
          <div class="actions">
            <a href="${result.secure_url}" target="_blank" class="btn btn-primary">🔗 View</a>
            <button class="btn btn-success" onclick="navigator.clipboard.writeText('${result.secure_url}')">📋 Copy URL</button>
          </div>
        </div>
      </div>
      <script>
        const resizeObserver = new ResizeObserver((entries) => {
          entries.forEach((entry) => {
            window.parent.postMessage({
              type: "ui-size-change",
              payload: { height: entry.contentRect.height },
            }, "*");
          });
        });
        resizeObserver.observe(document.documentElement);
      </script>
    </body>
    </html>
    `;
}
注意 HTML 底部的 ResizeObserver。
那段小代码让 iframe 高度与内容保持同步,所以如果 UI 变大或变小,窗口会自动调整。没有它,你的 UI 可能会被裁切,很难看全。
是什么让 MCP-UI 可交互?
干净的 UI 很好,但当那些按钮真的做事时,就有趣得多。这就是 UI 动作的用武之地;它们把静态布局变成能回话给你的智能体的交互工具。
在我的 Cloudinary 服务器里,我在 createUploadResultUI 的 <script> 块中、紧接 ResizeObserver 之后加了两个 UI 动作:
- 提示动作 → 向 goose 发出一条提示,请它把图片配上表情包式的说明。
点击查看代码
  function makeMeme() {
    window.parent.postMessage({
      type: "prompt",
      payload: {
        prompt: "Create a funny meme caption for this image. Make it humorous and engaging."
      }
    }, "*");
  }
- 链接动作 → 打开 Twitter,并预先带上已上传的图片,让你一键分享。
点击查看代码
        function shareOnTwitter() {
            const tweetText = encodeURIComponent(
            "I didn’t write this tweet… goose did. (${result.resource_type} included). & here’s how you can do it too 🧵 #MCPUI");
            const imageUrl = encodeURIComponent("${result.secure_url}");
            const twitterUrl = "https://twitter.com/intent/tweet?text=" + tweetText + "&url=" + imageUrl;

            window.parent.postMessage({
            type: "link",
            payload: { url: twitterUrl }
            }, "*");
        }
想看现场?这是 goose 替我发的推文。
提示和链接只是两个例子。MCP-UI 还支持 Tool、Intent 和 Notify 动作。
步骤 4:看看差异有多小
这部分让我震惊:让一个工具兼容 UI,只是很小的代码改动。
这是旧版本:
return {
    content: [
        {
            type: "text",
            text: JSON.stringify(response, null, 2)
        }
    ]
};
这是带 MCP-UI 支持的新版本:
return {
    content: [
        {
            type: "text",
            text: `🎉 Upload successful!\n\n${JSON.stringify(response, null, 2)}`
        },
        createUIResource({
            uri: `ui://cloudinary-upload/${result.public_id}`,
            content: { type: 'rawHtml', htmlString: this.createUploadResultUI(result) },
            encoding: 'text'
        })
    ]
};
就这样。多一个资源,goose 突然就渲染出完整 UI。
Filesystem:同样的模式
为了证明这不是一次性的,我也让 Filesystem MCP 服务器兼容了 UI。
之前: 文本输出(goose 默认显示的)
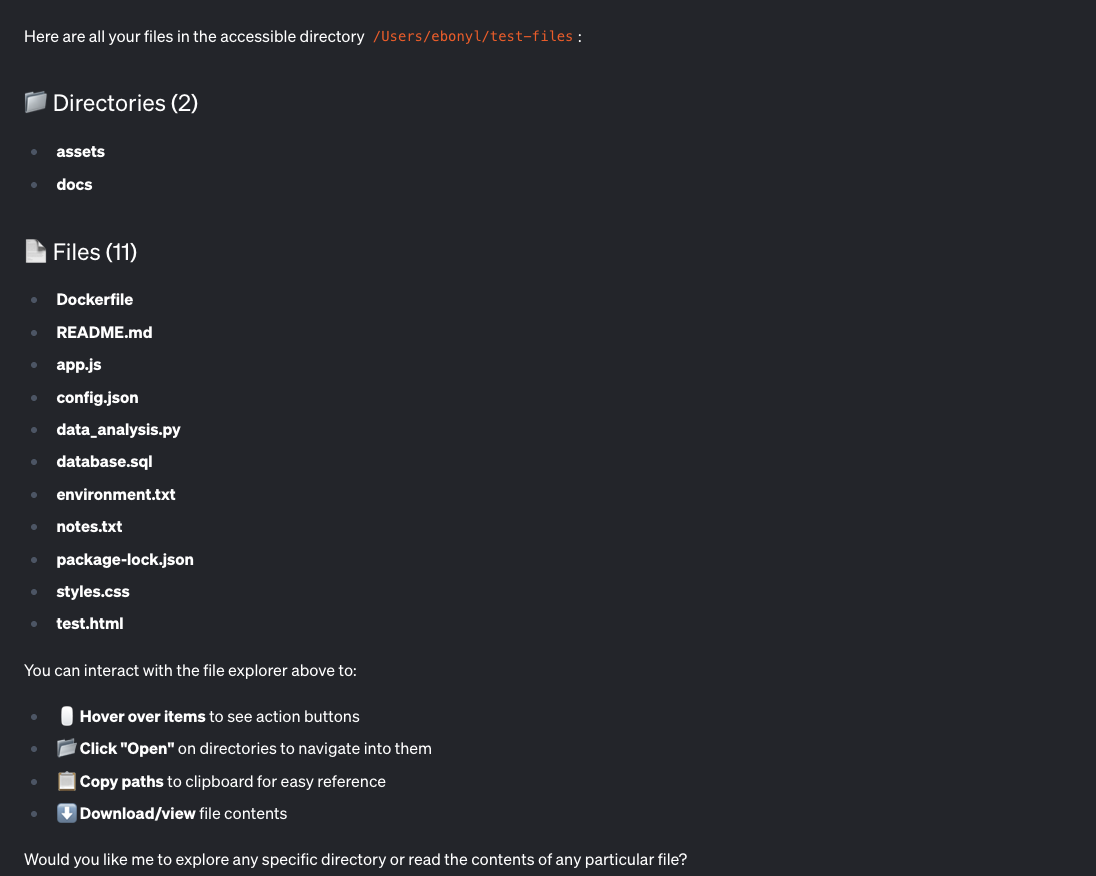
之后: UI 输出(带 MCP-UI 的交互式浏览器)
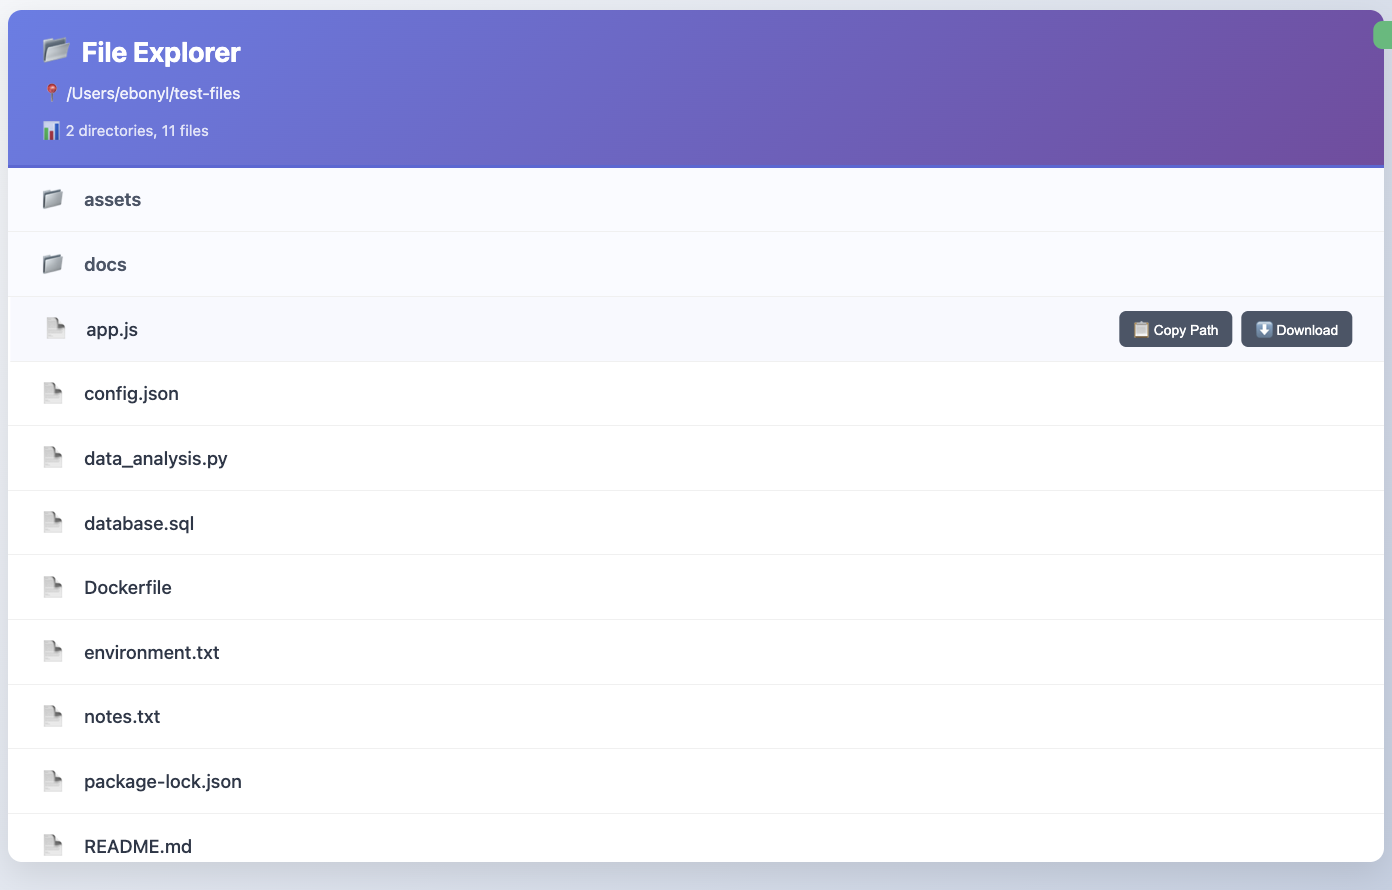
你需要的唯一差异在这里:
return {
    content: [
        { type: "text", text: `📂 Files in ${directoryPath}:\n\n${textResponse}` },
        createUIResource({
            uri: `ui://filesystem/explorer/${encodeURIComponent(directoryPath)}`,
            content: { type: "rawHtml", htmlString: htmlContent },
            encoding: "text",
        })
    ]
};
走在曲线前面
我已经让两台 MCP 服务器兼容了 UI,而 MCP-UI 甚至还没完全铺开。这对我来说很疯狂。
把视野拉开,你会看到其他公司也在往这里推。goose 和 Postman 已经支持渲染和几种 UI 动作。在现在的 goose 里,一个按钮可以发出新提示,或打开外部链接。这还不是完整愿景,但已经足以开始构建更像迷你应用、而不是静态回应的体验。
这就是让我兴奋的地方:我们没有干等。我们在公开地实验,并塑造未来的感觉。
自己试试
想看它实际运行?
下载 goose,给你的 MCP 服务器做一次自己的 UI 改头换面,亲眼看看这种魔力。无聊的文本提示再也不会是同一种感觉。
有问题? 看看我们的文档,浏览博客,或加入我们的 Discord 和 GitHub Discussions。我们很希望你来。